Wednesday, May 8, 2013

Oven Tacos

I've mentioned this recipe before here...we eat it so much I figure it deserves it's own post!

This dinner makes an appearance on our table 2-3 times a month. Easy. Healthy. Yummy. Fast. Score.


I love that it only takes a few ingredients and minimal prep time.

Let's get started, shall we?

First, brown your meat. I normally use ground turkey since it's cheaper but ground beef is delicious too!


Once it's fully cooked, drain the extra grease and add back to the pan. ADD in a can of refried beans...


Don't worry - it's not supposed to look pretty. At all. It will taste awesome...trust me. 

Spice it up however you please - I like to use CUMIN, CHILI POWDER, GARLIC POWDER and ONION POWDER. I never really measure....just some of this and that....more cumin and chili powder and less garlic and onion powder....trust your nose. 

Once everything is all mixed and smelling good turn off the heat. 

Get out your hard shell tacos....and line in a 9x13 pan. I like to line mine with foil so clean-up is super easy. 


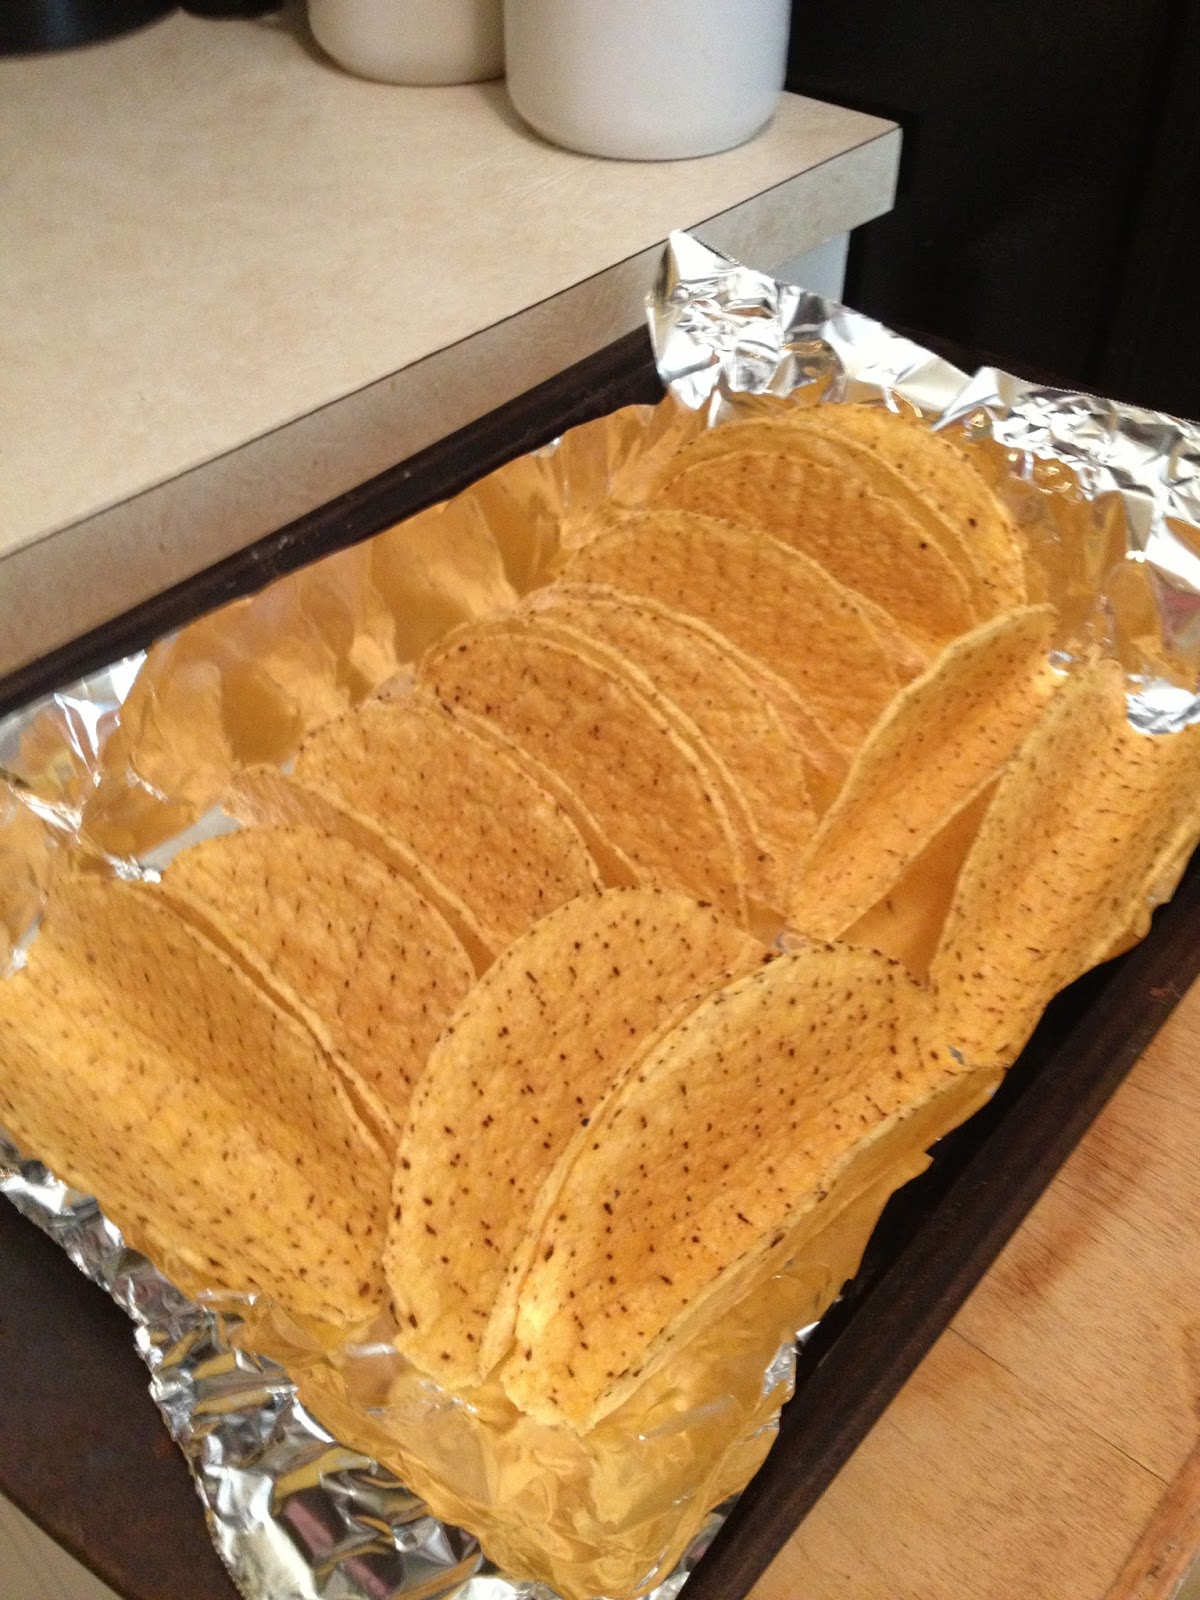
I have 12 in my pan - which works perfectly since the pack I buy has 12 in it! 

My secret to this recipe is this next step....totally not in the original....you HAVE to do it though....

Sprinkle cheese in the bottoms of the shells! My logic is that the cheese melts and creates a 'barrier' of sorts to keep the moist meat/beans away from the shell and avoids a soggy bottom. Who wants a soggy bottom? Not I. 


Then scoop in your meat/bean mix. I can fill all my shells and have maybe a tablespoon or so leftover....so pretty much all my meat/beans are used up! 


Then sprinkle MORE cheese on top! Mmmmm....


Pop in a 350* oven for about 10 min or until cheese is melted. All you're doing is warming the shell and melting the cheese...so you really can't go wrong. Unless you leave it in there for an hour. That'd be wrong...and burned. 

Here's what comes out! Yum! 


Carefully take out your tacos and top to your liking. (Use common sense when taking them out - you have melted cheese as 'glue' to your pan so gracefully pull them up) 

This time we had sour cream and cilantro for toppings. Other times we'd had shredded lettuce, salsa, guacamole or green onions as options. These are also delicious plain! That's the way my oldest son enjoys them. 


Oven Tacos
Inspired by MommyImHungry.blogspot.com

Ingredients:

1 lb ground meat (turkey or beef) 
1 can refried beans 
Cumin
Chili Powder
Garlic Powder
Onion Powder
Shredded Cheese
Hard Taco Shells
Toppings of choice! 

DO IT: 

1. Brown and drain your meat. 
2. Add in can of refried beans and seasonings.
3. Stir till combined and turn off heat. 
4. Line up shells in 9x13 pan.
5. Sprinkle cheese in bottom of shells. 
6. Distribute meat/bean mix in all shells.
7. Top with more cheese.
8. Bake in 350* for about 10 minutes or until cheese is melted. 
9. Carefully remove tacos and top as desired! ENJOY! 

Saturday, May 4, 2013

Kiwi Trick

I love Kiwi.

I used to take a knife and cut off the peeling like you would a potato. Not horrible -- it worked.

Then I saw this method.

I laughed - I thought it wouldn't work.

I tried it.


Guess what? It TOTALLY works. It's super slick.

Here's what you do....

Cut off the ends of your kiwi (so it has a flat part to stand on and an open flat part on top)

Slide a spoon into the fruit really close to the skin and circle around....then pop your fruit out!


Cool 'eh?

I thought so.

Happy kiwi eating!

Wednesday, May 1, 2013

Baked Sweet and Sour Chicken - aka the BEST dinner ever.

I've raved about this recipe a few times already...here's the original link where I found this gem.

My family gobbles this up like no one's business - I don't blame them. I'm in on the shove-as-much-as-you-can-in-and-get-seconds-FAST game.


I normally double or TRIPLE the amount of chicken the original recipe calls for (remember, I said my family likes it??) - If I double my chicken I keep the sauce amount the same but if I triple it I will make more sauce....totally up to you. Joys of cooking!

The only CON of this recipe (which really isn't a con...it's just proof that I'm a tad lazy) is that it takes TIME. It takes time to coat the chicken, it takes time to sauté the chicken and then you babysit it in the oven for an hour (stirring every 15 min) - BUT it's TOTALLY worth it. Do it. You'll thank me. I accept chocolate and flowers. Or Caribou. Or all three. I digress. Here's the How-To....

BAKED SWEET AND SOUR CHICKEN

Start with thawed chicken (I've done it with chicken breasts and a different time with chicken thighs - use what you want - or whatever's on sale) and cut into bite sized pieces.

Get your coating stations set: Cornstarch in one bowl and Eggs in another bowl...


Take your chicken (a few pieces at a time) and toss in cornstarch - then transfer to the eggs and swirl around...then set in a pan (with oil and heated at Med-High) to brown...repeat until your pan is full


Let your chicken hang out in your pan until each side is nice and browned (not cooking it all the way through)....you may have some stray pieces of egg that will fry - no worries. Just take them out when you transfer your chicken to the pan.

This step is the most time consuming for me....probably because I have a small-ish frying pan and I do SO much meat. I normally have to do this process three times (washing my pan in-between). Even though this is the longest (and therefore annoying) step it's a necessary step to create that 'take-out' taste and feel to this dish. DO IT.

Back to making dinner....

While your chicken is browning away on the stove (remember you're not cooking it all the way - just crisping the outside) make your sauce..

It's a super-easy sauce. If you're anti-ketchup (I'm personally cool with ketchup...I know some are not...) you could always make your own. 


Remember how I said this is a 'time consuming' recipe? Well, in my house, when I do a dinner that might require some extra time I normally get to re-organize my kitchen. AKA: my baby takes everything out of my cupboards and I get to put it away....TOTALLY worth it for this meal. Plus he's cute. And sitting on a mini-muffin tin.


So, once you're done browning your chicken put it in a GREASED dish. Since I do a ton of meat I use my 9x13 pan and my glass pie pan. Make sure you spray it. Pretty Please. You'll thank me later. 

POUR your sauce over the chicken (once you've browned ALL your chicken and it's ALL in your dishes) - I normally split it 50/50 between my pans. 


POP it into a pre-heated 325* oven, uncovered. 

Take it out every 15 minutes and STIR your chicken around. Do this FOUR times (grand total of 60 minutes cooking time). 

I have issues remembering to stir things if I don't set a timer. So, set a timer for 15 minutes and go about your business. 

THIS is what comes out after 60 minutes --- gorgeous!! 


See why I said to SPRAY your pans? Can you imagine what it'd look like without spray? Ugh. Spray those bad boys.

Oh this is so good. I don't know what does it...maybe it's the sauce? Maybe it's the coating? Maybe it's the fact that you worked in the kitchen for over an hour? Whatever it is...it's AWESOME.

Eat Up. And fast - go get seconds!


Baked Sweet and Sour Chicken 
Adapted from life-as-a-lofthouse.blogspot.com

Ingredients (as I do it):

3 lbs chicken (breast or thighs) *3-lbs will fill two pans - use 1.5-lb if you only want one pan* 
1 cup cornstarch
2-4 eggs (start with 2 and add more if you run out)
Vegetable Oil

Sauce:
3/4 cup sugar
4 Tb ketchup
1/2 cup white vinegar
1 Tb soy sauce
1 tsp garlic powder

DO IT: 

1. Cut chicken into bite size pieces and toss in cornstarch and dip in beaten eggs.

2. Heat some oil over med-high heat and cook chicken till browned (not cooked all the way though).

3. Transfer chicken to SPRAYED dish (9x13 or glass pie pan).

4. Repeat steps 1-3 until all chicken is browned.

5. Make sauce - mix sugar, ketchup, vinegar, soy sauce and garlic powder.

6. Pour over chicken.

7. Bake in a 325* oven, uncovered, for an hour. STIRRING every 15 minutes (four sets of 15 minutes).

8. ENJOY!


**Let me know what you think when you try this! I know you'll love it. **

Saturday, April 20, 2013

Chicken and White Bean Enchiladas

I made these for dinner last night. Whenever I try something new I'm always a tad nervous incase it's a flop....well...this one is AWESOME!


I got the recipe from here and modified it a little to fit our liking.

To make the filling - start some oil in a pan and sauté some garlic till fragrant, then add in a can of green chilies, a can of white beans, 1/3 cup chicken broth and some cumin...


Turn the heat to low and move over to your sauce. 

In a medium sauce pan melt 1 Tb of butter....add in 2 Tb of flour and mix it up...add in a can of green chilies and 1 cup chicken broth...stir till thickened and remove from heat. 


Back to the filling...

Add in some cooked-shredded chicken (about a breast) and stir it in...


Your filling's done!

Back to the sauce....

With your pot off the heat stir in 1/2 cup of sour cream till incorporated...


Sauce is done! 

Now to assemble...

Pour about 1/2 cup of your sauce in the bottom of a SPRAYED 9x13 pan. 

Take a flour tortilla and lay about 1/3 cup of filling in the middle and wrap it up - and line it in your pan. 


Pour the rest of your sauce over your enchiladas and top with some shredded cheese...


Pop into a 350* oven, covered, for about 30 minutes...take foil off and broil the top if you want...looky what you get! 


Chicken and White Bean Enchiladas
inspired by SkinnyTaste.com

Ingredients:

Filling:
1 tsp Olive Oil
2 Cloves Garlic - grated 
1 (4.5 oz) can Green Chilies
1 (15.5 oz) can White Beans 
8 oz cooked, shredded Chicken breast (about 1 breast) 
1/3 Cup Chicken Broth
1 tsp Cumin

Sauce: 
1 Tablespoon Butter
2 Tablespoon Flour
1 (4.5 oz) can Green Chilies 
1 Cup Chicken Broth
1/2 Cup Sour Cream

Shredded Cheese
Flour Tortillas (I used 8) 

DO IT: 

(preheat oven to 350*)
1. In a pan heat your oil and sauté garlic till fragrant. 
2. Add green chilies, white beans, broth and cumin - stir and lower heat to low. 
3. In a medium sauce pan melt your butter. 
4. Stir in flour and move around till paste-like. 
5. Add in can of green chilies and chicken broth and stir till smooth and starts to thicken then remove from heat. 
6. Add cooked chicken to filling pan and stir into beans/chilies. 
7. Stir in sour cream into sauce (away from the heat of stove) till nice and smooth. 
8. SPRAY your 9x13 pan and spread 1/2 cup of sauce in the bottom. 
9. Assemble enchiladas: Lay about 1/3 cup of filling in the middle of a tortilla and wrap it up. Line up enchiladas in your pan (I was able to fill/fit 8 in mine). 
10. Pour sauce over the top of enchiladas and top with cheese. 
11. BAKE covered for about 30 minutes then uncover and broil for a few minutes. 
12. ENJOY! 

*This recipe was so good on so many levels! 

I loved that it had a homemade sauce - for some reason it makes me feel all susie-homemaker or something....plus it's really fun to do! 

I loved that it only used ONE chicken breast! I'm all about stretching my meat (and budget!) - thankfully my family will eat beans without blinking an eye. 

I love that it's an oven meal - this means I can prep everything in advance and have my pan hanging out in the fridge. Then when late afternoon rolls around all I have to do is pop it in the oven! Score. 

I love that it's tasty - there's lots of flavor from all those green chilies but not a lot of heat (which is good considering 3/5 of my crew are kids!) - of course my hubby doctored his up with lots of hot sauce and other spicy goods. 

TRY IT! YUM. 

Tuesday, April 16, 2013

One Pot Dinner - Pasta and Broccoli

We've established I like easy -- and healthy -- and most of all YUMMY.

Well, this little gem from Martha Stewart is all 3 of those!

Start with your boiling water...add some penne and set your timer....


While it's boiling away chop up a head of fresh broccoli....


When there's SIX minutes left for your pasta ADD in your broccoli to the same pot....

While that's boiling away whip up the super simple dressing - I like to GRATE my garlic and lemon zest....


Drain your pasta/broccoli and then toss with your dressing - throw in a handful (or two) of cheese and dinner's DONE!


Told ya it was easy. 

Here's the actual recipe if you need it....

Garlic/Lemon Penne with Broccoli
*from MarthaStewart.com

Ingredients
1 Box Penne Pasta
1 Head Broccoli
6 Tablespoons Olive Oil
5 Cloves Garlic - grated
1/4 Lemon - Zest and Juice
1-2 Handfuls Fresh Parmesan or Romano Cheese

DO IT: 

1. Bring a big pot of water to a boil - ADD penne and set timer according to directions for Al Dente (mine was 12 min).

2. While Penne is boiling, CUT up your broccoli into cut florets.

3. When there's SIX minutes left on your Penne timer ADD your broccoli to the same pot.

4. While Penne and Broccoli is boiling - MIX your Oil, Garlic, Lemon Zest and Lemon Juice in a bowl.

5. DRAIN Penne/Broccoli pot and return to big pot - POUR your Oil mixture and TOSS. ADD a few handfuls of cheese and mix gently.

This meal took me 12 minutes from when my water started boiling. Can't beat that for speed! It was the perfect quick and healthy meal for my family. I'm sure if you needed meat you could toss some cooked shredded chicken or ring sausage at the end.

Monday, April 15, 2013

Creamy Avocado Dip

I'm a dip kinda gal...I love salsa, sour cream, hummus, guacamole, ranch and the list goes on!

When I saw this dip I knew I'd love it.


*Greek Yogurt - YUM
*Avocado - YUM
*Garlic - YUM
*Lime - YUM

Seriously? How can you go wrong with those ingredients?

Here's where I got the idea: Link. 

We enjoyed our dip with black-bean/corn oven quesadillas

What I ended up doing was a tad different but still delicious - here's what I did....

Creamy Avocado Dip
inspired by TwoPeasAndTheirPod.com

Ingredients: 
1/2 Cup Greek Yogurt
2 Avocados, peeled and pitted
1 Clove Garlic, grated
2 Tablespoon fresh Lime Juice
1 teaspoon fresh Lime Zest
1/4 teaspoon Cumin

DO IT: 

1. Mix everything in your food processor (or blender) till almost smooth. I like to leave a little texture to mine.

2. ENJOY!

*Don't forget the lime juice - or your avocados beautiful green may turn to a non-appealing brown.
*Other add-in ideas: Jalapeños, Cilantro, Purple Onions

**I bought jalapeños specifically for this dip and guess what....I forgot them! So, if you're not a jalapeño person the dip is still AWESOME sans peppers. Next time I'm totally adding 'em in though.

Kid Plate - I wish my plate had little sections! 

This dip is perfect for chips, quesadillas, on tacos, burritos, or anything else that's dip-able! 

Friday, April 12, 2013

Breakfast Cookies

I love breakfast. Mmmmm. I'm all about easy-healthy-fast breakfast stuff (cause I'm most definitely NOT a morning person....)

I found this VeRy EaSy basic recipe on Pinterest - TWO ingredients? Could it get any easier?

Here's the LINK that I used as my base.

Here's what I did:

Breakfast Cookie
From TheBurlapBag.com

Ingredients:
2 Bananas (the riper the better! Non-ripe bananas still work though...just more effort to mash them)
1 Cup Oats (the recipe calls for Quick Cooking Oats - which I didn't have. I used a packet of flavored instant oats (1/2 cup) and 1/2 cup old fashioned oats)

*I added in a tad of vanilla so technically I used 3 ingredients* 


DO IT: 

1. Mash you bananas in a bowl.

2. Mix in your oats (and vanilla if want).

3. Stir in Add-Ins of choice (chocolate chips, nuts, etc..) I kept mine simple this time with no add-ins.

4. SPRAY cookie sheet. Don't forget this step. Can you imagine scrubbing off baked on oatmeal?? ick. SPRAY IT. 

5. BAKE at 350* for 15 min.

6. ENJOY!


Verdict: These were super EASY and really YUMMY! My kids liked them and I probably should've doubled it - they were gobbled up it 5 minutes.

I read (and agree) that using Old Fashioned Oats would probably yield a tougher cookie since the oats don't get cooked as quick. I wonder if you made the mix and let it sit for a while (overnight in the fridge maybe?) if the Old Fashioned Oats would soak up some of the liquid and cook better. Since I used half instant and half O.F. mine came out fine - not too tough. The flavor from the instant pack added a nice touch too! I used an Apple/Cinnamon packet which paired well with the bananas....Mmmm.

I will definitely be doing this one again and experimenting with different add-ins and types of oats! 

Thursday, April 11, 2013

Food in Review (week 11)

Another week complete! Here's an abbreviated list of what we ate...

...I'll go in detail with some of them soon! I promise.

MONDAY: Baked Sweet and Sour Chicken 

Link: Here.

DO IT. This one ROCKS! 

TUESDAY: Tilapia/Rice/Broccoli 

Nothing special to it - I baked our fish with a little EVOO/Pepper/Lemon Zest.

Served with Rice and Broccoli - done!

WEDNESDAY: Turkey Wild Rice Casserole 

Link: Here. 

The recipe calls for chicken but I like to switch it up and used ground turkey this time - verdict? Yum. Totally works. Classic comfort food right here! It's like Wild Rice Soup in a pan.

THURSDAY: Ravioli Lasagna

I have plans to blog in detail the recipe for this soon....very soon! I'll give you a brief overview:

It's a lazyman (or lazyGirl in my case) lasagna layered with Cheese Ravioli, your fave Red Sauce, Italian Sausage and Cheese. Easy Peasy - and totally delicious! This is a perfect freezer meal or dish to bring to someone. Stay tuned for the complete recipe!

FRIDAY: Crock Pot Stuffed Peppers

Link: Here. 

Meh. I was underwhelmed by this one. I dig the idea of stuffed peppers in the slow cooker and the peppers themselves came out great - I just wasn't a fan of the stuffed part....I'll try it again with some tweaking (cause that's what I do!) and find the perfect filling. When I discover that - you better believe I'll share it!

**In the defense of the recipe website I didn't follow their recipe exactly...so perhaps the amounts and ingredients they have would be great!**

So, there's a quick overview of what was on our table last week - I'll share the complete Ravioli Lasagna recipe soon. It's an easy, fail-proof, yummy dish you'll want to check out!

Wednesday, April 10, 2013

Easy Oven Mac

Mmmmm Mac-n-Cheese. Classic comfort food. I've searched high and low for a recipe I like for homemade Mac and finally I combined all the basic concepts to make my own. I'll warn you: it's super SIMPLE. Cuz that's how I roll.

I personally don't like the box stuff -- too bright orange and saucy for me....plus who really knows what's in those powdered packets anyways?! 

Something magical happens when you put Mac-n-Cheese in the oven (ok..not magical but I still dig it) - it turns into a scoop-able dish that doesn't get all over your kids faces and isn't dripping with liquid-ey sauce. Magic? maybe not. Personal preference for eating and cleaning? Yep.

I'm rambling...here's the simple recipe. The wonderful thing about simple recipes is that YOU can personalize it however you please!


Oven Mac-n-Cheese

You Need: 
* Box of Elbow Macaroni (I try to use Whole Wheat so I don't feel so bad....)
* 4 Tbs Butter
* 4 Tbs Flour
* 2 Cups Chicken Broth
* 2 Cups Shredded Cheese (use what you like...this time I used part Cheddar and part Colby)
* Topping of choice (I'll list all the possibilities later)

DO IT: 

* Boil your noodles according to the box for Al Dente (they'll finish cooking in the oven) in a big pot and drain.

* Meanwhile, in a medium sauce pan melt your 4 Tbs butter.

* Add in your 4 Tb of flour and stir-stir-stir! It should get to be peanut butter consistency in quick order.

* Pour in your 2 cups chicken broth and stir again...keep stirring to mix it thoroughly.

* Add in your 2 cups of cheese - keep stirring! Don't stop. I get all fancy and stir in a figure-8 for this. Don't get frustrated when all your cheese clumps...keep stirring! When you feel like it's a lost cause....keep stirring! I promise it'll come together....figure-8 that pot till you get a beautiful, creamy sauce. **Here you can add in whatever spices you please. Sometimes I do simple salt/pepper, other times I throw in some garlic powder, or whatever your little heart desires!**

* Put your cooked/drained noodles back in the big pot and pour your awesome sauce over 'em. Mix it up real well!

* SPRAY a 9x13 dish - pour your gorgeous pot of Mac in and spread it around.

* TOP with your desired toppings and either cover and store in the fridge/freezer till cooking time or pop in a 350* oven. I do 30 min from the fridge so if you're cooking it right from the hot pot I bet you could do 20 min. (Covered to start then uncovered to brown the yummy topping under the broiler for the last few minutes)

* Scoop out a big old serving and ENJOY!


TOPPING IDEAS: 

*Bacon/Cheese/French's Fried Onions (this is what I did tonight....Oh.My.Goodness.)
*Bread Crumbs
*Extra Cheese
*Crumbled Potato Chips
*Anything Salty!

If you enjoy the comfort food of Mac-n-Cheese you should give this homemade version a whirl! It's good. And simple. And it makes A LOT. Gotta love leftovers!

Saturday, April 6, 2013

Food in Review (week 10)

So here's what I fed my crew not last week but the week before....I'm a little late but life's been a little busy these days! As long as food gets to the table and my kids are clothed I call it a successful day - ha.

Hopefully you can find something new to try in your weekly menu!

MONDAY: Ravioli and Vegetable Soup 

I found a simple recipe on Pinterest (where else, right?) and decided to modify it a tad and give it a whirl...

Here's what I put in mine:

1 onion, chopped
3 carrots, chopped
3 celery stalks, chopped
1 tsp thyme (or to taste) 
2 cups chicken broth
3 cups water
10 oz cheese ravioli 
2 cups fresh spinach, chopped
Parmesan cheese for topping

In a large pot, sauté your veggies in some oil till tender. 

Sprinkle some thyme over veggies. 

Pour in broth and water - bring to a boil. 

Add in ravioli and boil according to package directions. 

TWO minutes before ravioli would be complete add in your chopped spinach and let wilt during last few minutes of cook time. 

SERVE with a sprinkle of cheese over and a side of bread. 

I don't have a picture of the completed dish....it's a pretty simple soup - I'm sure you can imagine it!

TUESDAY: Turkey Burgers, Tator Tots, Broccoli and Fresh Pineapple

Mmmmm. We love these burgers over here. You probably could conclude that yourself if you've read many of my other menus.

HERE's the recipe for these delicious (and easy) burgers.

Click on ^ link to see the BEAUTIFUL burger that results...seriously good. 

I served them this time with some fresh pineapple (remember my cool contraption I got for those?) and some steamed broccoli. 

WEDNESDAY: Santa Fe Beans and Rice in Tortilla Wraps

This was a recent gem I found on Pinterest....we love it! Last time I served it with some tortilla chips to use as forks. This time we wrapped up the yummy rice and beans in a soft tortilla wrap. 

Soooo good. Meatless. Cheap. High Protein. Feeds a Crowd. Can't Lose. 

Remember that I use white rice (instead of brown) and I use GREEK YOGURT in place of sour cream. 

Try it. Here's the link 

Pic from Recipe Website

THURSDAY: Baked Garlic Chicken, Rice and Peas

I found this simple baked chicken recipe on....you guessed it....PINTEREST. 

It wasn't bad but it also wasn't blow-your-socks-off-wow-that's-tasty either. 

Here's the recipe I followed. 

 Photo from Recipe Website

I served this with some rice and a side of peas. There was something refreshingly SIMPLE about this meal - no fancy frills or unexpected flavor combos. So, if you're looking for an easy meal this might be for you! I'm not sure if I'll purposefully make it but I'll keep it in my mind for those nights where I really don't want to make what I planned (you know what I mean right? Those nights when you really don't want to stand for an hour and read detailed instructions....) 

FRIDAY: Chicken Pumpkin White Bean Chili

Oh Yum. 

I've made this with turkey (as the recipe calls for) but this time I threw caution to the wind and used shredded CHICKEN! Rebellious I know...

What resulted was spectacular! 

It was a creamy, thick, flavorful, chili. Beautiful color. NO tomatoes. No icky bottom for my baby. TMI? Yep. 

Here's the recipe. 
Photo from Recipe Website

Here's a recipe with what I did different: 

Chicken Pumpkin White Bean Chili
Adapted from SkinnyTaste.com

You Need: 
  • 1.5 lb cooked chicken (roughly shredded) 
  • 2 tsp garlic powder
  • 2 tsp onion powder
  • 1 tsp chili powder, to taste
  • 2 tsp cumin
  • 1 tsp oregano
  • 2 (15 oz cans) of white northern - rinsed and drained
  • 15 oz can pumpkin puree (not pumpkin pie filling)
  • 4.5 oz canned chopped green chiles
  • 2 cups chicken broth

DO IT:

In your handy crock pot MIX pumpkin, broth, and seasonings. 

ADD in beans, chiles, and chicken. STIR well. 

Set your slow cooker to LOW for 4-6 hours (you're just warming it up...everything's already cooked) 

TOP with sour cream, cheese, green onions. 

YUM. 

**There ya have it. My menu from 2 weeks ago - I'm optimistic that I'll have last week's menu up soon...we shall see! **

Monday, April 1, 2013

Jalapeño-Bacon Cheese Ball!

Wow. Make this.


If you like bacon (who doesn't??) and if you like cheese (again...who doesn't??) then you need to get this in your mouth ASAP.

For Easter yesterday I brought a Jalapeño-Bacon Cheese Ball with some fancy crackers to add to the appetizer spread.

It was my first attempt at a cheese ball. I thought it looked easy enough and had a cool presentation...plus I got to make a sphere! I was a little 'type-A/perfectionist' with the whole sphere deal...and it paid off! Finally - all my PLAYDOH skills were put to good use - I knew they'd come in handy someday!

Jalapeño-Bacon Cheese Ball
Adapted from BrownEyedBaker

Ingredients 
8 ounces cream cheese - room temp
1/3 cup shredded cheddar cheese
6-7 slices bacon, cooked and chopped
2-3 jalapeños, seeded and chopped
1 garlic cloves, grated
1 tablespoon parsley
1/2 teaspoon cumin
1/4 cup chopped pecans
1 teaspoon garlic powder

In a bowl, mix together cream cheese, cheddar, bacon, jalapeños, grated garlic, parsley and cumin.

I started with a spoon and quickly realized this wasn't going to cut it....I re-washed my hands extra good and got in there! Mix 'er up really well and then use your mad playdoh skills to form it into a perfect sphere.

On a big plate mix your pecans and garlic powder. ROLL your sphere around in the pecans - slightly pressing them in as your turn it.

Lay your beautiful-nut-covered-sphere on a piece of plastic wrap and wrap it up. CHILL for at least an hour (more if possible) to set.


ENJOY spread on some crackers! 

Notes:
*I BAKE my bacon in the oven - by far the best method! 
*I baked 12 pieces of bacon....and then ate 1/2 of them. Leaving me with the perfect amount. Totally planned. Or not... I like bacon. 
*I used 2 BIG jalapeños...I'm sure 3 normal/small peppers would work too! 
*I have a sweet microplane tool I use to grate my garlic...highly recommend it! If you don't have one you could easily chop the garlic too. 
*When not devouring the cheese ball store in the fridge. 

You're Welcome. 


Wednesday, March 27, 2013

Food in Review (week 9)

So, I'm a little late in the game but here's what I fed my crew last week!

SUNDAY: Oven Tacos with Rice

I've linked to this before...here it is. We LOVE this method of hard shell tacos! They don't fall apart. They stay nice and crunchy. They all come out of the oven at the SAME time -- no major assembly required! We also love how you can customize them to your liking. This last time I loaded mine with fresh avocado...MMMMmmm.

Photo from Recipe website

MONDAY: Santa Fe Beans and Rice with Chips

Another WIN for a meat-less meal! I like to try and have at least one meal per week without meat to help the budget and this one will definitely be making regular visits on our menu.

Here's the recipe I followed. I did a few modifications -- here's what I did different:

*instead of sour cream I used Greek Yogurt.
*instead of brown rice I used Jasmine Rice.
*instead of baking it in a casserole dish I used my Pie Pan (and it looked super cute!)

Photo from Recipe website 

Like I said - we loved this meal. I'm making it tonight and serving it wrapped in tortillas. Mmmm I'm drooling...

TUESDAY: Bourbon Chicken with Rice and Broccoli (crock pot) 

Good Ole Crock Pot helped me out this day! I love that I can get everything set in the morning and come dinner time I have a delicious meal waiting for me.

Here's the recipe I used. I doubled the sauce to have extra for over the rice. The recipe doesn't say to use the crock pot but I did - and it worked beautifully. So, if you don't have hours to let it hang in the crock pot use the stovetop method.

Photo from Recipe website. 

I steamed some broccoli and made some rice to round out this meal.

WEDNESDAY: Chicken Fajitas 

I made up the chicken in my crock pot with some classic fajitas seasonings: cumin, chili powder, garlic, and I accidentally (ha!) put some cinnamon in there (I thought it was cumin and then I realized....) --- side note: cinnamon on chicken with those other flavors ROCK. It was actually really good! Who knew.

Right before dinner I chopped up some bell peppers and onions to sauté on the stove top. Pair this with some rice and you have an easy dinner! We wrapped and rolled our fillings in a soft tortilla and ate away.

THURSDAY:  Turkey Meatloaf, Mashed Potatoes and Roasted Carrots

I'm a broken record I know. I've done this meal before...a lot. We love it. It's good homestyle cooking! Can't go wrong with a delicious turkey meatloaf and classic mashed potatoes and those super sweet roasted carrots. 

Photo from Recipe Website

A friend of mine gave me the tip to bake my meatloaf in muffin tins to speed up the baking time and make them little individual sized! I ran with that concept and formed my meat into big meatballs and baked them in the oven (I lined my baking dish with foil so I would have less cleanup). 

I was feeling a little crazy with my mashed potatoes and stirred in some roasted red pepper HUMMUS while mashing them.

Verdict? Delish. It added some nice color and some spectacular flavor! 

We all know how obsessed I am with roasting my carrots. I love 'em.

Photo from Recipe website 

FRIDAY: PARTY! 

We celebrated my Grandma's 73rd birthday this day! We all worked together and created quite the spread of Asian dishes. My personal contribution wasn't that Asian though...I was in charge of FRUIT. Gotta have fruit. Especially with the amount of kids we have at those gatherings! I brought Pineapple and Strawberries. 

Speaking of Pineapple....check out this SWEET gadget I scored at Target the other day! 


It's a nifty little contraption that cores the pineapple and slices it is perfect rings! Depending how hard or soft you push on the handle dictates how thick or thin your slices will be. I used it last night (pineapple with turkey burgers? yum) and it was soooo handy to have perfect slices to go on our burgers! 

Best thing? $9.99 at Target. I adore fresh pineapple but am horrible at getting the fruit out. Win in my book.

There ya have it folks....Happy Cooking!